My wordpress is already closed!!!

က်ေနာ္ရဲ့ ဒီေနရာေလးကို ရပ္တန္႔ထားတာ ေတာ္ေတာ္ၾကာပါျပီ..

အြန္လိုင္းနဲ႔ အဆက္ျပတ္ခဲ့ကထဲကပါ.. အခု comment မွာ လာေတာင္းဆိုၾကတာေတြကို ေမးထဲမွာ ေတြ႔လို႔ ဒီေနရာမွာ လာေျပာတာပါ..

က်ေနာ့္ရဲ့ အသစ္လုပ္ထားတဲ့ epub ေတြအပါအဝင္ ေရးျဖစ္တာေတြ အမ်ားစုကို forum တစ္ခုျဖစ္တဲ့ ျမန္မာဆိုင္ဘာမီဒီယာ မွာပဲ လာဖတ္ၾကေစခ်င္ပါတယ္..

epub မ်ားအတြက္ ဆိုဒ္တစ္ခု လုပ္ဖို႔ေတာ့ စဥ္းစားထားပါတယ္.. ေလာေလာဆယ္ေတာ့ http://mmcybermedia.com မွာပဲရွိပါတယ္..

လုပ္ျဖစ္တာနဲ႔ ေျပာျပပါ့မယ္..

ေလာေလာဆယ္ ေဒါင္းမရသူမ်ားအတြက္ mediafire password ကေတာ့ bluespider(mmcybermedia) ပဲျဖစ္ပါတယ္

အဆင္ေျပၾကပါေစ..

Mediafire မွာ လိုခ်င္တဲ့ ဖိုင္မ်ား ရွာျခင္း

သီခ်င္းေတြ ဇတ္လမ္းေတြကို အင္တာနက္ကေန ေဒါင္းတဲ့အခါမွာ fileserve,filesonic,rapid စသျဖင့္ရွိၾကတဲ့အထဲမွာ Mediafire ကေနေဒါင္းရတာ အဆင္အေျပဆံုးဆိုတာ သိၾကမွာပါ။ အဲဒီေတာ့ mediafire မွာက သူ႔ေပၚမွာ တင္ထားတဲ့ file ေတြကို ရွာတာမပါပါဘူး။
ဒါေၾကာင့္ ကၽြန္ေတာ္တို႔က သူ႔အေပၚမွာ ရွိတာေတြကို ရွာဖို႔ နည္းသံုးရပါေတာ့တယ္။

နည္းႏွစ္မ်ိဳးရိွပါတယ္

ပထမနည္း

http://mediafiresearch.ucoz.com/
http://www.searchshared.com/mediafire.com/
http://www.uvrx.com/mediafire.html

အေပၚကလင့္ေတြကို သြားပါ
အဲဒီကေန လိုခ်င္တဲ့ စာလံုးကို ရိုက္ျပီး ရွာႏိုင္ပါတယ္။

ဒုတိယနည္း

http://www.google.com/ ကိုသြားျပီး search box ထဲမွာ site:mediafire.com ကိုရိုက္ျပီး space ေလးျခားၿပီး ရွာခ်င္တဲ့ နာမည္ကို ရိုက္ထည့္ရပါတယ္။ ထပ္ျပီး format အတိအက်လိုခ်င္ရင္ လိုခ်င္တဲ့ format ကို ပါ ရိုက္ထည့္ရပါတယ္။

ဥပမာ site:mediafire.com i love u mp3
site:mediafire.com brief time of history epub
site:mediafire.com andriod market zip
site:mediafire.com transformer avi

အဲဒီမွာ က်လာမယ့္လင့္ေတြထဲမွာ အဆင္ေျပတဲ့ဟာကို သြားလိုက္ရင္ ကိုလိုခ်င္တဲ့ mediafire ကိုေရာက္သြားပါလိမ့္မယ္။

Myanmar epubs

epub ဆိုတာ mobile ေတြအတြက္ အဆင္ေျပဖို႔ လုပ္ထားတာပါ။ ကၽြန္ေတာ္တို႔ဟာ pdf ေတြကို ဖံုးေတြေပၚက ၾကည့္တဲ့အခါမွာ screen ေသးတဲ့အတြက္ အဆင္မေျပျဖစ္ရပါတယ္။ ဒီ epub ကေတာ့ အဲလိုမဟုတ္ပါဘူး။ screen အလိုက္အဆင္ေျပေအာင္ လုပ္ေပးထားပါတယ္။ျပီးေတာ့ size ကလဲ ေတာ္ေတာ္ကြာပါတယ္။ ဒါေၾကာင့္လဲ လူသံုးမ်ားလာေနပါတယ္။

ကၽြန္ေတာ္ ျမန္မာဆိုင္ဘာမီဒီယာမွာ တင္ထားတဲ့ epub ေလးေတြကို တင္ေပးလိုက္ပါတယ္။ေနာက္အသစ္ထပ္လုပ္ျဖစ္တာနဲ႔ ထပ္တင္ေပးပါ့မယ္။ ေလာေလာဆယ္ ရွိတာေလးေတြ အရင္ယူထားလိုက္ပါ။ တခုေျပာခ်င္တာက ကၽြန္ေတာ္လုပ္ထားတာ ေဇာ္ဂ်ီန႔ဲပါ ခင္ဗ်ာ

ipod,iphone မွာ ibook နဲ႔ ဖတ္လို႔ရပါတယ္။
windowmobile အတြက္ေတာ့ freda ရွိပါတယ္။
andriod အတြက္ေတာ့ aldiko နဲ႔ရပါတယ္။


ေပ်ာက္ဆံုးေနေသာ ကမၻာ
lost world
http://www.mediafire.com/?03wo299b8wpw57m
http://www.filesonic.com/file/1079868581/ေပ်ာက္ဆံုးေနေသာကမၻာ.epub


၃၇မင္းႏွင့္နတ္မ်ိဳးစံု (ဆရာဦးကံမင္း)
37
http://www.mediafire.com/?hlzh9o00l9us2id
http://www.filesonic.com/file/1079868351/]http://www.filesonic.com/file/1079868351/[/url]၃၇_မင္း_ႏွင့္_နတ္မ်ိဳးစံု.epub


ကၽြန္ေတာ္ႏွင့္ ေဆာင္းရာသီ ဒႆန (တာရာမင္းေဝ)
winter
http://www.mediafire.com/?bor9htx5s39bljh
http://www.filesonic.com/file/1079868531/ကၽြန္ေတာ္ႏွင့္ေဆာင္းရာသီဒႆန.epub


အိမ္မက္အမ်ိဳးမ်ိဳးႏွင့္ အသားလႈပ္ နိမိတ္
dream
http://www.mediafire.com/?mdwi9i3jyv5loga
http://www.filesonic.com/file/1079868571/အိပ္မက္အမ်ိဳးမ်ိဳးႏွင့္_အသားလႈပ္နိမိတ္.epub


ျမန္မာ့နန္းစင္ရတနာမ်ား
jewel
http://www.mediafire.com/?xw4602xytklpdag

Posted in accessories. Tags: . 8 Comments »

WI-FI HOTSPOT FOR WINDOWS

Download and install at here..

http://www.mediafire.com/file/wxz3xf4591jfwqd/ConnectifyInstaller.exe

Once Installed, Connectify runs in the Notification Tray next to the system clock.

It might not be visible, because Windows 7 has cleaned up the Notification Tray to hide the icons that you don’t frequently use.

If you click on the small white triangle it will show all of the icons, including the Connectify radio wave icon.

To ensure that Connectify stays visible, select “Customize”.

Find Connectify in the list of programs and select “Show icons and notifications”.

To get started, click on the Connectify logo in the Notification Tray.

  1. Select the Internet connection you wish to share
  2. Choose a name for your new wireless network
  3. Choose a wireless password
  4. If the Mode box is visible, select “Access Point” if it is in the menu, otherwise, use “Ad Hoc”.
  5. Press the Start Hotspot Sharing button to turn on your wireless network
  6. Now, from your other devices, you can see your wireless network. Choose to join it, and enter the wireless password to connect.

Myanmarfont in rockmelt

rockmelt ဆိုတာ google ကို အေျခခံထားတဲ့ facebook အထူးျပဳတဲ့ browser ျဖစ္ပါတယ္။
ဒါေပမယ့္ ျမန္မာစာကေတာ့ ပံုမွန္ rockmelt မွာ support မလုပ္ပါဘူး။ ဒီေတာ့ ကၽြန္ေတာ္တို႔ ျမန္မာလိုေပၚေအာင္ လုပ္ဖို႔ လိုလာပါတယ္။
ကၽြန္ေတာ္ တစ္ဆင့္ျခင္း ရွင္းျပပါ့မယ္။

ပထမဆံုး အေနနဲ႔ ကြန္ပ်ဴတာထဲက
C:\Users\User\AppData\Local\RockMelt\User Data\Default\User StyleSheets ကိုသြားလိုက္ပါ။
ျပီးရင္ အဲ့ ထဲမွာ ရွိတဲ့ Custom.css ကို notepad နဲ႔ ဖြင့္လိုက္ပါ။ ကၽြန္ေတာ္ကေတာ့ notepad++ နဲ႔ သံုးပါတယ္။ ပိုေကာင္းလို႔ပါ။
မရွိရင္ေတာ့ notepad နဲ႔ လည္းျဖစ္ပါတယ္။
ျပီးရင္ ေအာက္ကစာေလးေတြကို ထည့္ျပီး save လိုက္ပါ။

* , html, body, div,p {font-family:Zawgyi-One !important;}

အဲဒါကေတာ့ log in မလုပ္ထားတဲ့သူေတြ အတြက္ပါ။ တခါလုပ္ျပီးသားဆိုရင္ေတာ့
C:\Users\User\AppData\Local\RockMelt\User Data\1146888411\User StyleSheets ကို သြားရမွျဖစ္ပါတယ္။
1146888411 ဆိုတာကေတာ့ အေျပာင္းအလဲ ရွိႏိုင္ပါတယ္။

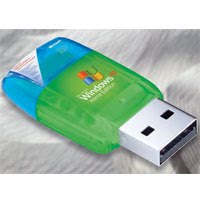
Installing Windows XP/7 from USB drive

1

လိုအပ္ခ်က္မ်ား

USB drive : 1 or 2 or 4 GB
Windows XP/7 image: CD ဒါမွ မဟုတ္ ေဒါင္းလုပ္လုပ္ထားတဲ့ image file(extension ဟာ .img , .uif , .nrg စသျဖင့္ အမ်ိဳးမ်ိဳး ရွိေပမယ့္ “.iso” ျဖစ္ရပါမယ္။
Flashboot : usb drive ကေန boot လုပ္ႏိုင္မယ့္ software

၁။ flashboot ကို ေဒါင္းျပီး install လုပ္ပါ။ (demo version ျဖစ္ေသာ္လည္း ရက္ ၃၀ trail မို႔ အလုပ္ျဖစ္ပါတယ္)
http://www.prime-expert.com/flashboot/download.php

၂။ အင္တာနက္မွ windows XP/7 image ကို ေဒါင္းပါ။ သို႔မဟုတ္ bootable CD ကို CDBurnerXP or magic iso or magic disk တစ္ခုခု အသံုးျပဳျပီး image ရေအာင္ လုပ္ပါ

၃။ ေအာက္ကပံုမ်ား ၾကည့္ျပီး တစ္ဆင့္ျခင္း လုပ္ေဆာင္ပါ

1) Run FlashBoot, click Next
1
2) Choose CD -> USB in Main Menu
1
3) Choose CD/DVD drive or image file and click Next
1
4) Choose “Convert Windows XP/2000 installation CD” from the scenario list and click Next
1
5) Choose target USB disk (flash, HDD) or image file and click Next
1
6) Enter volume label or leave it as is and click Next
1
7) Check summary information and click Next
1
process ျပီးသည့္အထိ ေစာင့္ပါ။
1
9) အခုဆိုရင္ USB disk ဟာ အသံုျပဳဖို႔ အဆင္သင့္ျဖစ္ေနပါျပီ။ OK ကို ႏွိပ္ျပီး ထြက္ပါ။
1

၄။ ယခုဆိုရင္ သင့္မွာ bootable flash drive တစ္ေခ်ာင္းရွိေနပါျပီ။ ထို bootable flash drive ကို သင္ window တင္ခ်င္တဲ့ စက္မွာ တပ္ျပီး reboot လုပ္လိုက္ပါ။

၅။ Boot menu ကိူသြားပါ။ ထိုေနာက္ သင့္ USB device ကို menu မွာ select မွတ္ပါ။

၆။ ေအာက္ကလင့္မွ ျပထားတဲ့ creenshots မ်ားအတိုင္း လိုက္လုပ္ပါ။
http://www.prime-expert.com/flashboot/xpinst_gallery/
partitions လုပ္ခ်ိန္တြင္ သတိထားပါ

Using zawgyi on Chrome

ကၽြန္ေတာ္တို႔ Chrome ကို သံုးတဲ့အခါမွာ font ခ်ိန္းလိုက္ရင္ ေပၚခ်င္တဲ့ေနရာေပၚ မေပၚခ်င္တဲ့ေနရာမေပၚ ျဖစ္တတ္ပါတယ္။
အထူးသျဖင့္ ေမး ၀င္စစ္လိုက္ရင္ font ျမင္ရမွာ မဟုတ္ပါဘူး။ ျမင္ခ်င္ရင္ေတာ့ chrome ကေပးတဲ့ font ခ်ိန္းတဲ့ေနရာအျပင္ ေနာက္တစ္ခုထပ္လုပ္ရပါမယ္။

chrome install လုပ္ထားတဲ့ folder ေလးထဲကို သြားလိုက္ပါ

C:\Users\Account Name \AppData\Local\Google\Chrome\User Data\Default\User StyleSheets

အဲဒီေအာက္မွာ CSS ဖိုင္ေလးကို ေတြ႔ပါမယ္။ အဲဒါကို notepad နဲ႔ ဖြင့္လိုက္ပါ။
ျပီးရင္ ေအာက္က ကၽြန္ေတာ္ေပးတဲ့ ကုတ္ေလး ထည့္လိုက္ပါ။

* , html, body, div,p {font-family:Zawgyi-One !important;}

ျပီးရင္ save လိုက္ပါ။
အဲဒီေနာက္မွာေတ့ာ ကၽြန္ေတာ္တိို႔ ေဇာ္ဂ်ီကို Chrome မွာ အဆင္ေျပစြာ သံုးႏိုင္ပါျပီ။

notepad ထဲမွာ စာေတြသူမ်ားမျမင္ေအာင္ ထားမယ္

text file ထဲမွာ စာေတြကိုဖြက္လို႕ရပါတယ္။ဒီအတိုင္းဖြင့္ၾကည့္ရင္ မျမင္ရေအာင္ေပါ့ဗ်ာ…

1) command prompt ကိုဖြင့္ဖို႕ အတြက္ Start–>Run မွာ cmd လို႕႐ိုက္ထည့္ျပီး Enter ေခါက္ပါ

2) command prompt မွာေအာက္ကကုဒ္ကို႐ိုက္ထည့္လိုက္ပါ။

C:\Documents and Settings\user>notepad xxxx.txt:hidden

xxxx ေနရာမွာ ကိုယ္ၾကိဳက္တဲ့နာမည္ေပးလို႕ရပါတယ္

3)ေပၚလာတဲ့ xxxx notepad ကို save လုပ္လိုက္ပါ

4) xxxx notepad ျဖစ္သြားပါလိမ့္မယ္

5)  အဲဒီ notepad မွာ စာအခ်ိဳ႕ေရးျပီး save လိုက္ပါ။

6) C:\Documents and Settings\user ေအာက္သြားျပီး အဲဒီ notepad ကို ဖြင့္ၾကည့္လိုက္ပါ။ ႐ိုက္ထားတဲ့စာေတြေတြ႕ရမွာမဟုတ္ေတာ့ပါဘူး

စာေတြကိုျပန္ေတြ႕ခ်င္ရင္ command prompt ကိုသြားျပီး ေအာက္ကအတိုင္း ထပ္႐ိုက္ထည့္လိုက္ပါ။

C:\Documents and Settings\user >notepad xxxx.txt:hidden

xxxx notepad ေပၚလာျပီး ဖြက္ထားတဲ့ စာေတြပါ ျပန္ေဖာ္ျပေပးပါလိမ့္မယ္

Show Current Music Track on Gtalk in WMP 12, Windows 7

Google Talk or gTalk chat application has a feature to show currently playing Music track on Windows Media player as you Status. On Windows Xp, it runs without problem but even since I upgraded to Windows 7, GTalk doesn’t update status on change of Music track on Windows Media Player 12.

It was a very small thing but I was unable to make it work. Actually there was no Google Talk Music Plugin for WMP 12 installed on Windows 7 system. So, Follow the steps given to start showing the name of song you are listening as Gtalk status:

Uninstall Google Talk.
Visit http://www.google.com/talk/
Click Download Google Talk client near the bottom of the page.
Save the installation file to your desktop.
5. Right-click the installation file (googletalk-setup.exe) on your desktop and select Run as administrator.
6. Follow the instructions to install Talk

Still not working?

  • Run Windows Media Player.
  • Then go to Tools and then options.
  • Click on the Plug-ins tab and select Background category in it.
  • Now check the option of “Google Talk music plug-in” on the right side.
  • Then Apply and exit.
Posted in accessories. Tags: , . 1 Comment »

Gtalk မွ ဘာသာျပန္ေပးတဲ့စနစ္

Gtalkရဲ႕ဘာသာျပန္စနစ္ကိုသံုးႏိုင္ဖို႔ Translation Botsေလးေတြကိုသိရမွာျဖစ္ၿပီး အဲဒီ Bots ေလးေတြရဲ႕ ေနာက္မွာ@bot.talk.google.com ထည့္ၿပီး invite လုပ္ရမွာျဖစ္ပါတယ္။
(Translation Bot ဆိုတာ ဘာသာျပန္တဲ့အလုပ္ကို အလိုအေလ်ာက္လုပ္ေဆာင္ေပးတဲ့ Computer Program တစ္ခုပဲ ျဖစ္ပါတယ္။)
Bots ေတြရဲ႕အမည္ကို ဘာသာစကားတိုင္းရဲ႕ကိုယ္စားျပဳစကားလံုးႏွစ္လံုး (ဥပမာ- English ဆိုရင္ EN ) ကို အသံုးျပဳထားပါတယ္။
ဒါေၾကာင့္ ဥပမာ…ကိုယ္က အဂၤလိပ္ကေန ဂ်ပန္ကို ေျပာင္းခ်င္တယ္ဆိုရင္ ပထမဆံုး en2ja@bot.talk.google.com ကို invite လုပ္ရမွာျဖစ္ပါတယ္။
invite လုပ္ၿပီးတာနဲ႔ ကိုယ့္ရဲ႕ contact list ထဲမွာ en2ja ဆိုတဲ့ contact person တစ္ေယာက္တိုးလာပါလိမ့္မယ္။
အဲဒီ contact person ဆီကို ကိုယ္ဘာသာျပန္ခ်င္တဲ့ စာေတြကို ရိုက္ထည့္ၿပီးေျပာလိုက္ရံုပါပဲ။
သူက ခ်က္ခ်င္း ဘာသာျပန္ေပးပါလိမ့္မယ္။
ဘာသာစကားတုိင္းအတြက္ အျပန္အလွန္ ဘာသာျပန္ၾကည့္ႏိုင္ပါတယ္။
ဥပမာ…အဂၤလိပ္-ဂ်ပန္ အတြက္ en2ja ဆို ဂ်ပန္-အဂၤလိပ္အတြက္ ja2en ကို invite လုပ္ေပးရံုပါပဲ။
အခုေဖာ္ျပထားတဲ့ bots ေလးေတြကေတာ့ အခုလက္ရွိအသံုးျပဳႏုိင္တဲ့ ဘာသာစကားေလးေတြျဖစ္ပါတယ္။
စုစုေပါင္း ဘာသာစကား(၂၆)ခု ကို အျပန္အလွန္ဘာသာျပန္ႏိုင္မွာျဖစ္ပါတယ္။

Arabic – English ar2en en2ar
Bulgarian – English bg2en en2bg
Czech – English cs2en en2cs
Danish – English da2en en2da
German – English de2en en2de
German – French de2fr fr2de
Greek – English el2en en2el
Spanish – English es2en en2es
Finnish – English fi2en en2fi
French – English fr2en en2fr
Hindi – English hi2en en2hi
Croatian – English hr2en en2hr
Italian – English it2en en2it
Japanese – English ja2en en2ja
Korean – English ko2en en2ko
Dutch – English nl2en en2nl
Norwegian – English no2en en2no
Polish – English pl2en en2pl
Portuguese – English pt2en en2pt
Romanian – English ro2en en2ro
Russian – English ru2en en2ru
Swedish – English sv2en en2sv
Chinese – English zh2en en2zh
Traditional Chinese -English zh-hant2en en2zh-hant
Traditional Chinese -Chinese zh-hant2zh zh2zh-hant